Blog

How to Choose the Best Door Trim for Your Project?

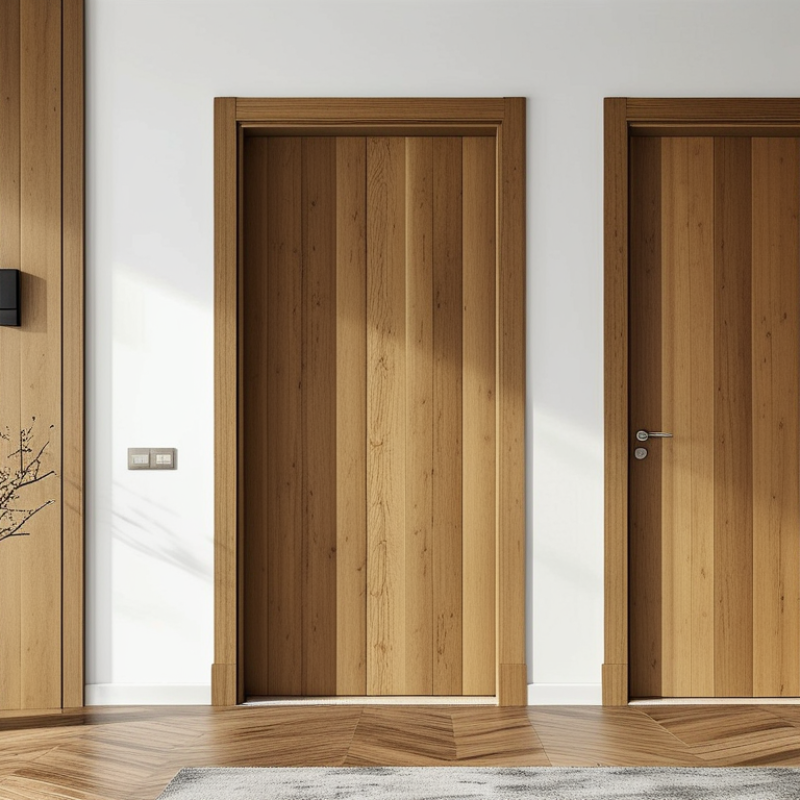
Choosing the best doors trim can change how a room feels, functions, and ages. It frames the doorway, hides uneven edges, and creates a visual connection between walls, floors, and doors. A narrow profile may suit a clean modern interior, while a wider, detailed design can support a traditional renovation.

The right choice depends on more than appearance. Measure the door opening, wall thickness, and available clearance before comparing materials. MDF offers a smooth, stable surface for painted interiors. Solid wood provides natural grain and can be repaired more easily. PVC may perform better in damp areas, such as bathrooms or laundry rooms. Each option has limitations.

Look closely at the installation conditions. Is the wall perfectly straight? Often, it is not. Small gaps may require careful scribing, flexible caulk, or a thoughtful adjustment to the trim layout. Paint color also matters; bright white can emphasize shadows, while a warmer tone may blend with wood flooring. I have found that attractive samples can look surprisingly different under actual room lighting.

A reliable decision balances durability, maintenance, proportion, and budget. Check product specifications, moisture ratings, and finish compatibility from established manufacturers. Do not choose a profile only because it looks impressive in a showroom. It must fit the door, the wall, and the way people use the space. Some projects benefit from professional advice, especially when openings are uneven or historical details must be preserved. Good doors trim should look intentional, remain secure, and support the room for years.
How to Choose the Best Door Trim for Your Project?

Understanding Door Trim Types and Their Functional Differences

Choosing door trim becomes easier when you understand what each type does. Casing covers the gap between the door frame and wall, creating a clean visual transition. It also hides uneven cuts and protects vulnerable drywall edges. Flat casing suits modern interiors, while routed or stepped profiles add traditional detail. Wider trim can make a tall doorway feel more substantial.

Material changes performance. Solid wood offers strength and can be repaired, but it may expand or shrink with seasonal humidity. Medium-density fiberboard provides a smooth painting surface and consistent dimensions, yet damaged edges are harder to restore. Moisture-resistant plastic trim works well near bathrooms, though its appearance may feel less natural. Select a profile that matches the baseboard, wall thickness, and expected traffic. Small details matter.

Installation experience often reveals problems that product descriptions miss. I once chose casing that looked elegant but left too little clearance beside a cabinet. Measure the opening, reveal, and nearby obstacles before cutting. Measure twice. Use a wider backband when the wall is irregular, or choose a simpler profile that can follow minor imperfections. Fasten trim securely, leave suitable expansion space, and seal exposed end grain where moisture is possible. My earlier preference for appearance sometimes caused extra fitting work. Function should guide the style, even when the final choice is not perfect.
Measuring the Doorway for an Accurate Trim Fit

Measuring the doorway accurately is the practical starting point for choosing door trim. The 2024 International Residential Code lists 80 inches as the common minimum door height for required egress doors. However, existing homes often vary. Never trust the nominal door size alone.

Measure the opening width at the top, center, and floor. Record the smallest number. Measure height on both jambs, then check the jamb depth and wall thickness. A difference of even ⅛ inch can create a visible casing gap. Use a steel tape, not a flexible ruler. Also check whether the floor slopes beneath the hinge side. It often does.

Measure from the finished floor to the underside of the head jamb. Mark the casing reveal around ⅛ inch, unless the project specification requires another dimension. ANSI/WDMA installation guidance supports field verification before ordering or cutting materials. That step prevents expensive adjustments later. I still recheck every measurement before cutting. A perfect-looking number can be wrong when flooring has not been installed. Leave room for shims, uneven drywall, and slightly twisted jambs. My first measurement is never the final measurement.

How to Choose the Best Door Trim for Your Project? - Measuring the Doorway for an Accurate Trim Fit

Project Factor How to Measure or Identify It Typical Data or Range Trim Selection Guidance
Finished Door Width Measure the door slab from one vertical edge to the other. Take measurements at the top, middle, and bottom. Common interior widths: 24, 28, 30, 32, and 36 inches. Use the actual slab width rather than relying only on the nominal door size. If the readings differ, base the trim layout on the smallest clear measurement.
Finished Door Height Measure from the top edge of the door slab to the finished floor or threshold. Check both sides of the doorway. A common interior door height is 80 inches. Other residential sizes may be 78 or 96 inches. Confirm the door height before cutting the side casing. Uneven floors may require the bottoms of the side pieces to be scribed or trimmed.
Jamb Depth Measure from the finished wall surface on one side to the finished wall surface on the other side, across the door jamb. Common prehung interior jamb depths include approximately 4 9/16 inches and 6 9/16 inches, depending on wall construction. Choose a jamb or extension that matches the finished wall thickness. Casing cannot properly conceal a jamb that is too narrow for the wall.
Wall Thickness Measure the complete finished wall, including drywall, plaster, paneling, tile, or other wall coverings. A typical non-load-bearing interior wall with drywall is approximately 4 1/2 inches thick. Measure finished surfaces, not exposed framing. Additional wall coverings can change the required jamb and trim depth.
Door Reveal Inspect the narrow, intentional gap between the door slab and the jamb or stop. Measure or maintain the reveal consistently around the door. A reveal of about 1/8 inch is commonly used for interior door casing layouts, although the existing door system may vary. Match the existing reveal when replacing casing. A consistent reveal improves alignment and prevents the trim from appearing uneven.
Casing Width Measure the face width of the casing from its inside edge to its outside edge. Common interior casing widths range from about 2 1/4 to 4 1/4 inches. Use narrower casing in compact rooms and wider casing for a stronger architectural presence. Make sure the selected width covers the gap between the jamb and wall.
Casing Thickness Measure the distance that the trim projects from the wall surface. Many interior casing profiles are approximately 1/2 to 3/4 inch thick. Match the thickness of nearby window and baseboard trim when creating a consistent interior style.
Side Casing Length Measure from the finished floor or desired bottom cut to the top of the horizontal head casing. Measure both sides separately. Length depends on door height, head casing width, flooring level, and the desired bottom clearance. Cut each side piece individually after checking the floor. Do not assume both sides require exactly the same length.
Head Casing Length Measure the outside distance between the outer edges of the two side casing pieces, or calculate the opening width plus both side casing widths. For a mitered frame: head casing length = opening width + twice the casing face width. Add only the allowance required by the selected joint. Dry-fit the pieces before making final cuts.
Mitered or Butted Corners Identify whether the top corners will use angled joints or square butt joints. Mitered corners are commonly cut at 45 degrees. Butt joints use square cuts. Mitered corners provide a continuous framed appearance. Butt joints are easier to install and are often suitable for simple or craftsman-style trim.
Trim Material Consider humidity, impact exposure, paint or stain requirements, and whether the wall is straight or irregular.
  • Solid wood: repairable and suitable for staining.
  • Finger-jointed wood: commonly used for paint-grade trim.
  • MDF: smooth and economical for dry interior areas.
  • Composite or PVC: useful where moisture resistance is important.
Use moisture-resistant material in bathrooms, laundry areas, and other damp locations. Use stable, straight stock when walls are uneven or the trim will be stained.
Wall Condition Place a straightedge across the wall and inspect for bowing, gaps, loose drywall, or uneven corners. There is no universal acceptable gap; the trim must be wide enough to cover the largest visible gap while remaining flat. Repair loose surfaces first. Wider casing can conceal larger gaps, but excessive gaps may require shimming, caulk, or drywall repair.
Flooring and Threshold Measure from the finished flooring surface, including tile, wood, laminate, or carpet, rather than from the subfloor. Floor heights vary by material and installation method, so the bottom of the trim must be fitted to the finished floor. Install or account for the final flooring height before making permanent cuts. Leave appropriate clearance from wet floors and thresholds.
Installation Waste Allowance Calculate the required finished lengths, then purchase additional material for test cuts, defects, grain matching, and installation errors. A practical allowance is approximately 10% for a straightforward project and 15% or more for complex layouts. Buy all pieces from the same material batch when possible. Extra stock is especially useful when using long, straight casing or matching an existing profile.
Final Fit Check Temporarily position the side and head pieces, check reveals, corner alignment, floor contact, and coverage of the wall-to-jamb gap. Check at least three points on each side: top, center, and bottom. Complete a dry fit before fastening. Mark each piece by location and orientation to reduce installation errors.
Measurement rule: Record every dimension in the same unit, measure each opening rather than assuming standard sizes, and verify all cuts with a dry fit before installation.

Selecting Materials, Styles, and Finishes for Your Space

Choosing door trim begins with the material, not the color. Solid wood suits historic rooms and can be repaired after dents. Finger-jointed wood costs less, but exposed joints may become visible near bright windows. Medium-density fiberboard offers a smooth profile and stable painting surface. However, it dislikes repeated moisture. In bathrooms, use moisture-resistant composite trim and seal every cut edge.

Scale matters. The 2024 U.S. Houzz & Home Study reports that homeowners continue investing in functional renovations, especially areas needing better daily performance. That supports wider casing in open-plan interiors, where narrow trim can look visually weak. A 2.5- to 3.5-inch casing usually balances standard doors and modest ceiling heights. Taller rooms may accept a deeper profile, but ornate molding can overwhelm a small hallway.

Finish should respond to touch, light, and cleaning. EPA guidance notes that indoor pollutant levels can be two to five times higher than outdoor levels, so choose low-emitting coatings and ventilate during application. Satin paint hides fingerprints better than high-gloss paint, while clear finishes reveal wood grain but expose scratches. I once selected a dark casing for a sunlit entry; it looked elegant at night and harsh by afternoon. That mistake still matters. Test a 30-centimeter sample beside the door before ordering. Use warm white with warm flooring, or the contrast may feel accidental.

Matching Door Trim With Walls, Floors, and Interior Design

How to Choose the Best Door Trim for Your Project?

Door trim should connect the door, walls, and floor without competing with them. Start by comparing undertones. Warm oak flooring often suits cream, beige, or muted green walls. Cool gray floors may work better with crisp white, soft gray, or natural wood trim. Do not trust a small store sample alone. View it beside your actual flooring and wall paint. Daylight changes everything.

Match the trim’s scale to the room. A narrow casing can look balanced around a simple door and low ceiling. Wider trim can frame tall doors, but oversized profiles may crowd a small hallway. For modern interiors, flat trim creates a clean edge. In traditional rooms, beveled or stepped profiles can echo cabinet panels and floor details. If the walls have bold patterns, plain trim usually gives the eye a needed rest.

Material matters. Choose moisture-resistant trim for bathrooms, laundry areas, or rooms with frequent temperature changes. Wood can add warmth, but it needs careful sealing near damp floors. During a recent renovation, I nearly chose bright white trim. It looked fresh alone but felt harsh beside a warm stone floor. A softer shade worked better, though the match was not perfect. That small contrast gave the doorway more depth. Test trim samples beside the door, floor, and wall at different times of day. Check corners closely. Slight color differences can become surprisingly visible after installation.

How to Choose the Best Door Trim for Your Project?

Typical residential trim proportions can help coordinate door casing with wall height, flooring scale, and the overall interior design style.

Planning guide: Lower ceilings generally suit narrower casing and baseboards, while taller rooms can support wider trim. Use matching undertones with the wall and floor finishes, and choose crisp, wider profiles for traditional interiors or simpler profiles for modern spaces.

Comparing Installation Methods, Costs, and Maintenance Needs

How to Choose the Best Door Trim for Your Project?

Door trim decisions often depend on installation time, labor rates, and long-term maintenance. In my experience, pre-primed wood trim cuts easily and suits uneven walls, but it needs careful sealing near floors. Composite trim usually costs more upfront. However, it resists moisture better in bathrooms, laundry rooms, and entryways. Measure each wall separately. Small gaps become obvious beside a bright doorway.

Installation method changes the final budget. Nail installation is fast when the wall is straight and the trim is lightweight. Adhesive can reduce visible holes, but it may fail on dusty or textured surfaces. For masonry, installers may need anchors, drills, and extra preparation. That adds labor. I once underestimated a crooked frame and spent extra time shimming it. The lesson was simple: inspect the opening before pricing the work. Costs vary by region, material thickness, finish quality, and repair needs.

Tips: Compare the full installed cost, not only the trim price. Ask whether caulking, filling, sanding, painting, and waste removal are included. Choose washable paint in busy areas. Check lower corners every few months for swelling, loose joints, or damaged caulk. Keep a small amount of matching finish for repairs. It helps. Yet maintenance plans are not perfect; careless cleaning can still dull the surface. Exact product instructions should guide cleaning methods, especially for moisture-resistant materials.

Top