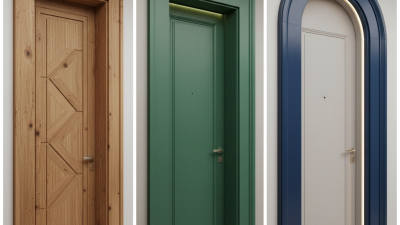
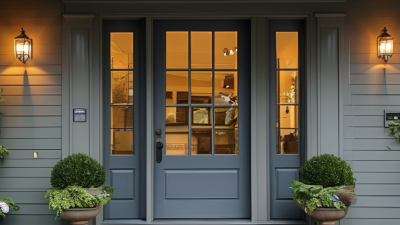
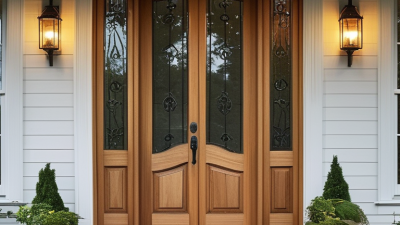
Exterior door trim frames the entrance, but it does far more than improve curb appeal. It covers the joint between the door unit, wall, and siding. It also helps shed rain, hide uneven gaps, and protect vulnerable edges from impact. It is not decoration alone.
The U.S. Department of Energy’s Building America Solution Center identifies doors, jambs, thresholds, and surrounding transitions as important air-sealing locations. Poorly sealed trim can allow drafts, moisture, and insects into the wall assembly. Experienced installers therefore inspect the wall plane before choosing profiles or materials. A beautiful casing cannot correct a poorly flashed opening. That point is easy to miss.
Industry data also shows why entrance details deserve careful planning. Zonda’s 2024 Cost vs. Value Report estimated a 188.1% cost recouped for steel entry door replacement. The figure concerns the complete door project, not trim alone. Still, it reflects the entrance’s strong influence on perceived value. Trim helps communicate that value through scale, shadow lines, color, and finish quality.
Choosing exterior door trim requires more than matching an interior casing. Consider rainfall, ultraviolet exposure, freeze-thaw cycles, insects, maintenance, and the home’s architectural period. Fiber-cement, cellular PVC, engineered wood, and treated solid wood each perform differently. Measure the reveal carefully. Check how the trim meets the sill and siding. Small gaps become obvious after caulk shrinks.
The best choice balances weather resistance, proportion, installation skill, and budget. There is no universally perfect profile. Even durable materials can fail when water is trapped behind them. A thoughtful selection process makes the doorway look intentional and remain dependable for years.
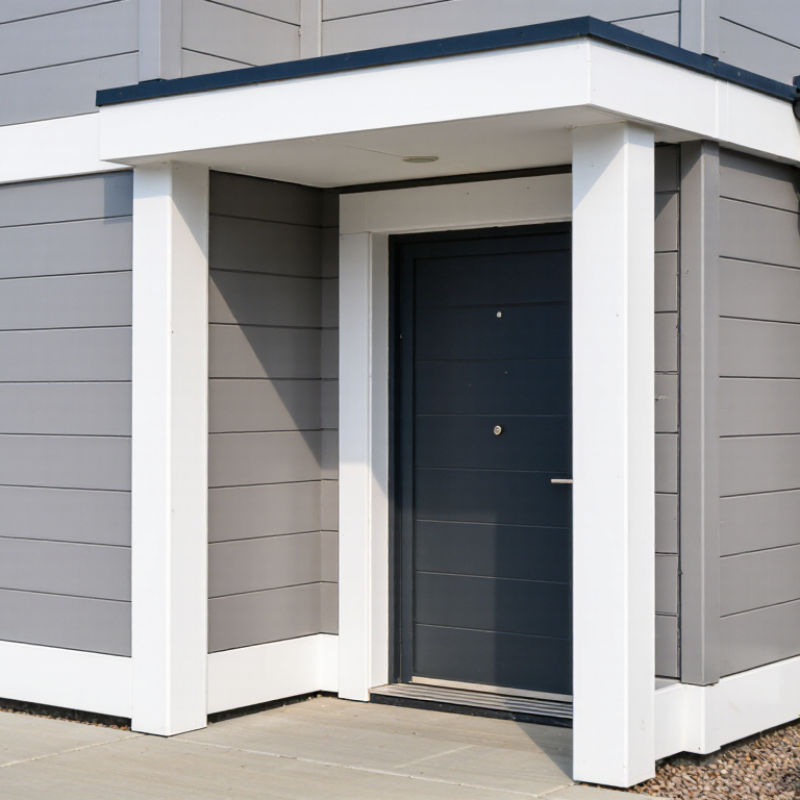
Exterior door trim is the material installed around a door frame. It creates a clean transition between the door, wall, and exterior finish. The trim also covers construction gaps and protects vulnerable joints from rain, wind, and sunlight.
It does more than improve appearance. Properly fitted trim helps direct water away from the frame. It can reduce drafts when paired with effective caulking and weatherstripping. I have seen small gaps become serious problems after one wet season. Water entered behind the trim, softened the wood, and stained the interior wall. A narrow reveal can also make the door look uneven. Details matter.
Choosing trim requires attention to the home’s exposure and construction. Painted wood offers a traditional appearance, but it needs regular inspections. Composite materials resist moisture and often require less maintenance. Metal trim can suit modern designs and withstand harsh weather. Measure the opening carefully before buying materials. Check the wall thickness, corner conditions, and threshold position. These details are easy to overlook.
I once selected trim mainly for its profile and color. The proportions looked attractive, but the material was poorly suited to constant rain. That choice needed correction later. A better approach considers drainage, movement, maintenance, and the surrounding siding. Leave enough room for expansion, but do not create open channels for water. Good trim should look deliberate and perform quietly.
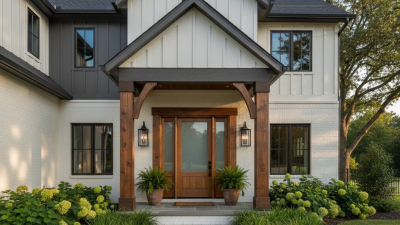
Exterior door trim frames the entrance and protects the wall around the doorway. Its main parts include side casings, a head casing, sill, brickmold, and sometimes a drip cap. Side casings run vertically along the jambs. The head casing spans the top. A sill helps shed rain, while a drip cap directs water away from the opening. These pieces should create a continuous barrier, not merely a decorative outline.
Trim styles change the door’s visual character. Flat trim suits clean, modern facades. Stepped profiles add depth and work well with traditional homes. Craftsman-style trim often uses wider boards, square edges, and a strong horizontal head. Colonial profiles may include layered molding. Simple is not always plain. It can make a narrow doorway appear wider.
Choose trim by considering weather, wall cladding, door size, and maintenance needs. Wood offers warmth but needs careful sealing, especially at end cuts and joints. PVC and composite materials resist moisture, though some products can expand in strong heat. Fiber-cement trim is durable but requires precise cutting and compatible fasteners. Color also matters; dark trim may absorb more heat and expose uneven caulking.
A practical check is to inspect the threshold after rain. Water should move away from the door, not collect behind the casing. Many installations fail at small gaps. There is no perfect profile. A visually attractive choice can still be wrong for a windy, wet entry. Think beyond appearance, and question details that seem “good enough.”
| Trim Part | Primary Function | Common Materials | Typical Dimensions | Common Style Options | Selection Considerations |
|---|---|---|---|---|---|
| Exterior Casing | Frames the door opening and covers the joint between the door jamb and the wall surface. | Primed wood, PVC, cellular composite, fiber cement, and aluminum. | Usually 2.5–5.25 inches wide and about 0.5–1 inch thick. | Flat, craftsman, colonial, fluted, stepped, and rabbeted profiles. | Choose a width that suits the facade scale and leaves enough coverage for the installation gap. |
| Brickmould | Provides an exterior frame around a prehung door and helps cover the rough opening. | Wood, vinyl, composite, aluminum, and molded PVC. | Commonly about 1.25 inches wide and 1.125 inches thick, although profiles vary. | Standard square edge, decorative molded, low-maintenance, and color-matched profiles. | Confirm that its projection and width work with the siding, masonry, or stucco around the opening. |
| Door Jamb | Forms the vertical and horizontal frame that supports the hinges, strike plate, and weather seals. | Wood, composite, fiberglass-reinforced material, vinyl, and metal. | Depth commonly ranges from 4.625–9.25 inches to match wall construction. | Flush, adjustable, kerfed, split, and extension jamb systems. | Measure the finished wall thickness, including drywall, sheathing, siding, or interior trim. |
| Head Casing | Creates the horizontal top section of the trim assembly and visually caps the doorway. | Exterior-rated wood, PVC, composite, fiber cement, and metal. | Often matches the side casing in width; decorative headers may project 1–4 inches beyond it. | Simple straight header, projecting cap, crown detail, pediment, and craftsman beam. | Use a sloped or flashed top detail where needed to direct water away from the door. |
| Sill and Threshold | Supports the door, bridges the floor transition, and helps block wind-driven rain and drafts. | Anodized aluminum, stainless steel, composite, hardwood, and treated wood. | Common thresholds are about 4–8 inches deep; height depends on the door system and accessibility needs. | Adjustable, low-profile, ADA-friendly, thermal-break, beveled, and handicap-accessible designs. | Coordinate height with flooring and verify drainage, slope, seal compression, and local accessibility requirements. |
| Drip Cap or Head Flashing | Redirects water above the doorway so it does not collect behind the head trim. | Coated aluminum, galvanized steel, copper, flexible membrane, and engineered polymer. | Usually extends beyond both sides of the opening; projection is commonly about 1–2 inches. | Surface-mounted, concealed, sloped, and integrated flashing profiles. | Install it as part of a continuous water-management system rather than relying on trim alone. |
| Corner Blocks and Rosettes | Add visual detail at casing intersections and make transitions easier to install. | Wood, polyurethane, PVC, composite, and resin-based exterior molding. | Often 3.5–6 inches square, selected to coordinate with the casing width. | Plain square blocks, rosettes, carved motifs, and geometric patterns. | Best suited to traditional, Victorian, cottage, and farmhouse designs; avoid excessive detail on minimalist facades. |
| Decorative Pediment | Creates a prominent architectural focal point above the entrance. | Exterior-rated wood, PVC, polyurethane, fiberglass, and composite materials. | Width normally follows the door and casing assembly; projection varies by design. | Triangular, curved, broken, sunburst, and classical-inspired forms. | Check clearance for porch ceilings, lighting, house numbers, and storm doors before installation. |
| Weatherseal Stop | Creates a compression seal around the door slab to reduce air and water infiltration. | Silicone, EPDM rubber, thermoplastic elastomer, vinyl, and flexible foam. | Profile size depends on the kerf, stop design, and required compression. | Kerf-insert, adhesive-backed, screw-fixed, magnetic, and adjustable systems. | Select a weatherseal rated for exterior exposure and replace it when it becomes brittle, compressed, or torn. |
Exterior door trim frames the entrance and protects the wall around the door. Material choice should match moisture, sunlight, temperature changes, and maintenance expectations. Solid wood offers natural grain and easy repair, but it needs careful sealing on every edge. It may swell when water reaches the end grain. PVC resists rot and works well in damp areas. It can, however, expand in strong heat. Fiber-cement trim handles sun and moisture effectively, though cutting it requires dust control and accurate tools. Composite trim provides stable dimensions and a painted appearance. It often costs more than basic wood.
Study the doorway before choosing a finish. A south-facing entrance may need a material with strong ultraviolet resistance. A covered porch gives wood more protection. Check the wall surface too. Uneven masonry can make rigid trim look poorly fitted.
Small gaps should receive an exterior-rated sealant, while larger gaps need proper backing material. Seal the top edge carefully, but do not block drainage paths. Water needs somewhere to escape.
A practical mistake is choosing a material only by appearance. I once saw a bright painted profile installed where sprinklers soaked the lower corners daily. The finish looked attractive for one season, then stains appeared. Consider cleaning, repainting, fasteners, and future repairs before installation. The best trim is not always the most expensive; it is the one suited to the entrance’s actual exposure.
Exterior door trim is more than a decorative frame. It controls visual proportion, sheds rain, and helps seal the opening. Match its design with the door’s material, color, and architectural period. A wide, stepped casing suits a traditional entry with raised panels. A narrow, flat profile looks cleaner beside a modern slab door. The trim should also echo nearby window casings, siding lines, or porch columns.
Scale matters. For a standard 36-inch door, trim between four and six inches wide usually feels balanced. Larger entries can carry deeper profiles without looking crowded. Light-colored trim makes a dark door feel sharper. Dark trim creates stronger contrast, but it exposes dust and uneven joints. According to the U.S. Department of Energy, air sealing can reduce annual energy costs by 5% to 30%. Therefore, installers should seal behind the trim, not only caulk its visible edges. Zonda’s 2024 Cost vs. Value Report also found that steel entry-door replacement recovered 188.1% of its cost nationally. That figure concerns the door, not trim, yet it shows why entry details deserve careful planning.
Tips: Hold sample trim beside the door at morning and evening. Check shadows, siding texture, and roof color. Use moisture-resistant material in wet climates. Avoid copying a neighbor’s design blindly. It may look attractive there, but not on your façade. Even experienced installers sometimes choose trim that is too ornate. Recheck the proportions before cutting.
Use the chart as a practical design guide. Ratings from 1 to 5 indicate visual compatibility based on proportion, contrast, architectural character, and material coordination—not a market survey.
How to read it: Traditional and craftsman doors generally pair well with wider, layered trim, while modern doors usually benefit from simple, slim profiles. Match the trim color and material with the surrounding siding, brick, stone, or stucco so the doorway feels intentional rather than visually disconnected.
Exterior door trim frames the entryway and helps protect the wall around the door. It may use wood, composite, or metal, depending on moisture, style, and maintenance needs. Measuring begins with the existing opening, not the old trim. Measure the jamb width, side heights, head width, and available depth. Check the sill for slope and record uneven walls. Measure twice. Small errors become obvious after installation.
Remove loose trim carefully, then test-fit each piece around the door. Keep the reveal even, usually about 3 to 6 millimeters. Use a level and corrosion-resistant fasteners suited to the wall material. Shims can correct slight movement, but they should not force the frame out of alignment. Install head flashing where needed, and seal the upper joints without blocking drainage paths. Leave a small clearance above the sill to reduce water absorption. A tight-looking joint is not always a durable joint.
After installation, inspect the trim each season. Look for cracked paint, open caulk, soft wood, rust, or dark moisture marks. Clean dirt before applying new sealant. Repaint exposed wood when the finish starts thinning, rather than waiting for bare fibers. I once sealed a lower corner too heavily, and trapped water caused early swelling. That mistake changed my routine. Now I check drainage before adding more sealant, even when the joint looks unfinished. Loose fasteners deserve attention before the trim begins to move.