Blog

7 Tips for Choosing the Right Outside Trim?

Choosing the right outside trim is more than a decorative decision. It affects moisture control, energy performance, maintenance, and a home’s visual character.

The U.S. Department of Energy reports that windows can account for 25% to 30% of residential heating and cooling energy use. Trim cannot eliminate those losses, but correctly detailed trim can help protect window edges and reduce pathways for water and air. That distinction matters. A beautiful profile will not repair poor flashing or an unstable substrate.

Industry standards add useful discipline. ASTM International publishes test methods for materials, coatings, and weather resistance. The American Architectural Manufacturers Association, now part of the Fenestration and Glazing Industry Alliance, also provides guidance for window installation and exterior performance. These references support practical choices about material movement, fasteners, sealants, and exposure conditions.

Real projects reveal the difficult parts. A south-facing trim board may endure intense sunlight, while a shaded corner stays damp after rain. A narrow joint can open during seasonal expansion. A painted surface may look sound from the driveway but show splitting near fastener heads. Small details become expensive later.

This guide presents seven tips for choosing outside trim with those conditions in mind. It considers climate, material durability, profile scale, installation, paint compatibility, drainage, and long-term maintenance. Some recommendations may not fit every property. That is worth admitting. Local building practices, wall assemblies, and available products can change the best answer.

The goal is not simply attractive trim. It is trim that performs quietly, ages predictably, and remains practical to repair.
7 Tips for Choosing the Right Outside Trim?

Identify the Purpose and Performance Needs of Outside Trim

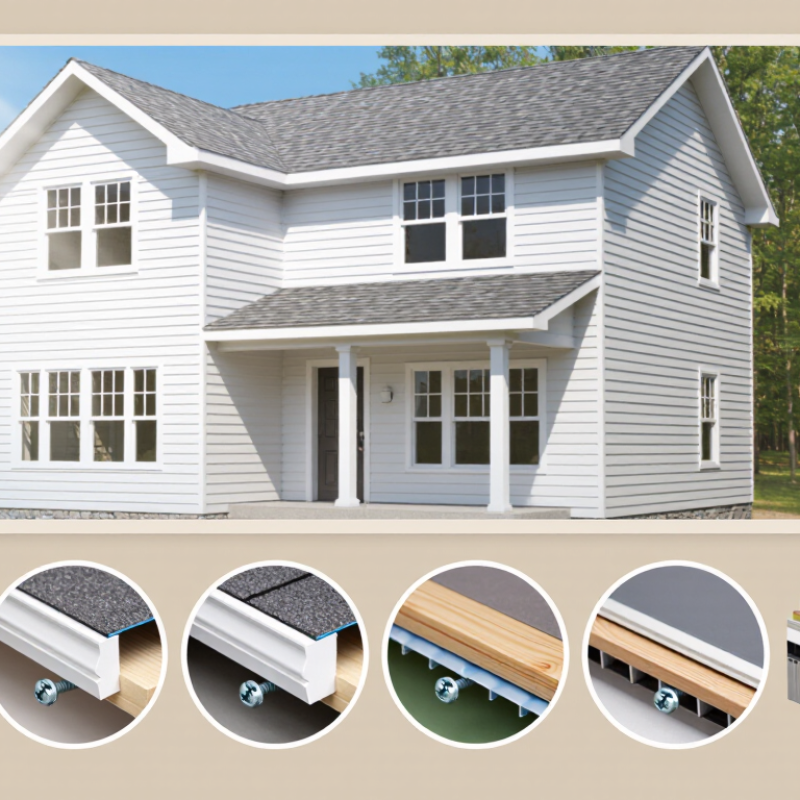
Outside trim does more than frame a window or sharpen a roofline. It directs rainwater, covers joints, and protects vulnerable edges from impact. Before choosing a profile, identify its job. Window trim may need a sloped top edge, while door casing may prioritize durability near foot traffic. In my installation experience, attractive trim fails quickly when water has nowhere to drain. Check the wall assembly, exposure, and local weather before comparing colors or textures. Small details matter.

Tip 1: Match the trim to the exposure. South-facing walls may receive intense heat, while shaded elevations often stay damp. Look for stable materials and finishes rated for moisture, temperature changes, and ultraviolet exposure. Ask for tested performance data, not just appearance claims. A sample can look convincing indoors. Outdoors, it may warp, fade, or show open joints.

Tip 2: Define maintenance expectations honestly. If the building is difficult to access, choose trim that tolerates occasional cleaning and inspection. Confirm fastening methods, expansion allowances, corner details, and sealant compatibility. These are practical performance questions, not decoration.

Tip 3: Review installation guidance with a qualified contractor. Even reliable trim can fail when edges are unsealed or drainage paths are blocked. I have seen rushed detailing create stains beneath sound windows. Recheck the choice after a rainy season; real weather can expose assumptions that drawings miss.

Evaluate Climate, Moisture Exposure, and Material Durability

Choosing outside trim is not only a style decision. Climate, moisture exposure, and material durability should guide the choice. A shaded coastal wall faces salt air and wind-driven rain. A sunny interior wall may face heat, ultraviolet exposure, and rapid drying. The National Oceanic and Atmospheric Administration reports that extreme rainfall events are becoming more frequent in many U.S. regions. That change increases the importance of drainage and sealed joints.

Tip: Map the exposure first. Check roof runoff, splash zones, prevailing wind, and daily sunlight. Trim near the ground deserves extra caution. Even a small gap can collect water behind the board. The U.S. Department of Agriculture Forest Products Laboratory identifies approximately 20% wood moisture content as a point where decay fungi can become active. A cheap moisture meter can reveal risks that paint conceals.

Tip: Match the material to the weakness of the location. Stable, low-absorption products often suit wet elevations, while properly coated wood can perform well when ventilation and maintenance are reliable. Read the manufacturer’s installation data, but question optimistic maintenance claims. No trim is maintenance-free. I have seen attractive profiles fail because end cuts were left unsealed. That detail matters.

Tip: Inspect before buying. Look for straight edges, consistent density, and clear finishing instructions. The American Architectural Manufacturers Association’s exterior performance standards emphasize resistance to water, air, and structural stress. Those tests are useful, but site conditions remain imperfect. A product rated for rain may still fail beside a leaking gutter. Choose the material after identifying the moisture path, not before.

Match Trim Profiles, Colors, and Textures to the Home’s Style

Tip 1: Match the trim profile to the home’s architectural language. Clean, narrow boards suit modern walls, while layered profiles feel more natural on traditional exteriors. Check the roofline, window shape, and door details before choosing. A small sample helps. I once selected a profile that looked elegant alone but felt too heavy around a compact window.

Tip 2: Treat color as part of the exterior’s structure, not a separate decoration. White trim can sharpen a darker facade, while warm neutrals can soften stone, brick, or muted siding. Compare samples outdoors during morning and late-afternoon light. Colors can shift dramatically. Avoid matching every surface exactly; gentle contrast usually gives windows and doors clearer definition.

Tip 3: Use texture to support the home’s surroundings and maintenance needs. Smooth trim reflects a crisp, contemporary style, while wood-grain textures add warmth to cottages and rural homes. Rough finishes may hide dust better, but they can collect moisture in poorly protected areas. Inspect joints, corners, and exposed edges carefully. Texture is not only visual.

Measure twice. Then review the whole facade from the street. A color that works near the entry may look unbalanced across a long wall. Local weather also matters, so confirm that the selected material and finish can handle sunlight, rain, and seasonal movement. Consult an experienced installer when profiles meet uneven masonry or older framing.

7 Tips for Choosing the Right Outside Trim

Match trim profiles, colors, and textures to the home’s architectural style.

The chart shows representative nominal trim widths commonly used for exterior applications. Wider elements such as fascia, rake trim, and corner boards create stronger visual definition, while narrower casings provide a cleaner appearance around windows and doors. Choose profiles that repeat the home’s existing proportions, then coordinate color contrast and surface texture with the siding and architectural style.

Check Measurements, Installation Details, and Building Code Requirements

7 Tips for Choosing the Right Outside Trim

Accurate measurements prevent most outside trim problems. Measure each opening at the top, middle, and bottom. Record the largest width and height. Check wall depth before choosing the trim profile. A small mistake can create uneven joints or expose the weather barrier. On site, I also inspect corners for swelling, loose cladding, and hidden moisture. Do not measure over damaged surfaces. That shortcut often fails.

Confirm the installation details before ordering materials. Leave the required clearance above decks, roofs, and paving. Use compatible flashing around windows and doors. Seal end cuts where moisture could enter. Fasteners should suit the trim material and the wall assembly. Plan joints away from heavy water flow. Dry-fit long pieces first. They may bow more than expected. Allow for expansion where the installation instructions require it, especially in changing temperatures.

Building codes can affect trim size, fire separation, drainage, and attachment methods. Local requirements may differ between a detached house and a multi-unit building. Verify the current rules with the building department or a qualified inspector. Check whether permits are needed before work begins. Never assume a familiar detail is automatically compliant. I have seen attractive trim fail inspection because flashing was missing behind it. Take photographs before covering critical layers. Keep product data and measurements with the project records.

7 Tips for Choosing the Right Outside Trim? - Check Measurements, Installation Details, and Building Code Requirements

Tip What to Check Practical Measurement or Detail Why It Matters Building-Code Consideration
1. Measure the opening accurately Confirm the opening size, wall depth, corner conditions, and existing trim coverage. Measure width at the top, middle, and bottom, and height at both sides and the center. Use the smallest measurement when planning the fit. Multiple measurements reveal settling, out-of-square framing, and inconsistent gaps. The trim must not reduce required ventilation, drainage, emergency egress, or clearances around doors and windows.
2. Choose a weather-resistant material Compare solid wood, fiber-cement, cellular PVC, engineered wood, and coated metal for the exposure level. For wet or highly exposed locations, select trim with documented moisture resistance and follow the manufacturer’s required paint or sealant system. Moisture absorption, swelling, splitting, and decay are common causes of exterior-trim failure. Materials and coatings may need to comply with local requirements for flame spread, fire separation, or weather exposure.
3. Verify the profile and coverage Check the trim width, thickness, reveal, projection, and compatibility with siding, masonry, or stucco. The selected profile should cover the joint continuously while leaving the manufacturer’s recommended drainage and sealant gaps. Insufficient coverage exposes joints; excessive projection can trap water or interfere with shutters, screens, and hardware. Do not block weep holes, flashing outlets, window drainage paths, or required clearances.
4. Plan water management first Review head flashing, sill flashing, end dams, sealant joints, and the connection to the water-resistive barrier. Use a sloped head detail where required, keep drainage paths open, and install flashing in the correct shingle-lapped sequence. Trim is decorative, but poorly integrated trim can direct water into the wall assembly. Local codes commonly require weather-resistive barriers and flashing practices that prevent concealed water intrusion.
5. Confirm the fastening method Match fasteners to the trim material, substrate, corrosion exposure, and expected movement. Use corrosion-resistant exterior fasteners, place them according to the product instructions, and avoid fastening too close to edges. Incorrect fasteners can cause staining, rust, cracking, loose joints, or galvanic corrosion. Fastening must maintain the required structural attachment and must not damage electrical, plumbing, or moisture-control components.
6. Allow for movement and sealing Identify butt joints, inside corners, end joints, and transitions between dissimilar materials. Use sealants and joint gaps specified for the material; do not bridge movement joints with rigid filler or excessive caulk. Seasonal expansion and contraction can split paint films, open joints, and pull trim away from the wall. Sealants should be compatible with adjacent materials and must not obstruct required drainage or ventilation openings.
7. Check local code and installation instructions Review adopted building, fire, energy, accessibility, and historic-district requirements before ordering materials. Confirm requirements with the local building department, especially for fire-rated walls, property-line conditions, replacement windows, doors, and multifamily buildings. Code requirements vary by location, occupancy, climate zone, and project type. Follow the currently adopted local code and the specific product installation instructions; obtain permits when required.

Note: Dimensions, clearances, flashing details, fastener spacing, and sealant requirements are product- and jurisdiction-specific. Always verify the current local requirements and installation instructions before construction.

Compare Costs, Maintenance Demands, and Long-Term Value

7 Tips for Choosing the Right Outside Trim

Tip 1: Compare the full installed cost, not just the board price. A low-cost material may need special flashing, primer, or skilled labor. In renovation estimates, fasteners and site preparation often change the final figure. Request itemized quotes with removal, installation, painting, and waste included.

Tip 2: Study maintenance demands beside your local weather. Wood can offer warmth and easy repairs, but it may need sealing every few years. Fiber cement usually resists moisture and insects, although cutting creates dust and requires careful handling. PVC needs less painting, yet extreme temperature changes can expose weak joints. Ask how each option performs after heavy rain, strong sunlight, and freezing nights. Small samples help.

Tip 3: Measure long-term value through repair frequency, appearance, and replacement difficulty. A durable trim profile can protect siding edges and window openings for many years. However, expensive materials are not automatically better. I once chose a cheaper trim for a shaded porch; the initial saving was real, but repainting came sooner than expected. That estimate was wrong.

Look closely at corners, seams, and end cuts before approving the work. Poorly sealed joints can cause swelling behind the trim, creating costs that remain invisible at installation. Check the installer’s experience, written warranty terms, and recommended maintenance schedule. Keep a small leftover piece for future repairs. It may save matching trouble later.

Top